How To Sync Itunes Library From Mac To Ipad
You use the Apple Books app to read or listen to items you download from the Book Store. But like Apple's Photos and iTunes apps, Books is an organizing tool, too. All of your ebooks, audiobooks, and PDFs are automatically organized into various standard collections, such as Audiobooks and Finished. But you can create your own collections that make it easier to keep your virtual bookshelves in order.
How to add a new collection
Mar 05, 2020 If you would like to remove them from the iPhone and sync media with the current Mac, click Remove & Sync. Now you have two options: Sync entire music Library or Sync selected artists, albums, genres and playlists. Choose the one according to the size of your music library and space available on your iPhone/iPad. Nov 04, 2018 How to sync your Books library on your Mac. In addition to keeping your Books library, bookmarks, notes, highlights, and PDF files in sync on all your iOS devices, you can get the Mac in on the action, too. As with syncing your Books library between your iOS devices, setting up syncing on your Mac is a two-step process. How to sync to iTunes: Types of data, media & content you can sync to your iPhone or iPad. Syncing between an iDevice and a Mac or PC can be a useful and efficient way of transferring a wide range. Nov 20, 2013 This class will show you how to sync music from your computer (Mac or PC) to your mobile device such as an iPod, iPhone, or iPad. Take our FREE classes at ht.
The Apple Books app includes some default collections. You can add to these as many collections as you want and define them however you like. For example, you can create a collection for a particular author, genre, or topic. And you can put the same book into multiple collections. Here's how:
- Tap the Library tab.
- Tap Collections.
- Scroll to the bottom of the list of collections and tap New Collection.
- Type a name for the collection.
- Tap Done.
How to add books to a collection
Empty collections are no fun. Here's how to populate them.
- Tap the Library tab.
- Tap Edit.
- Tap the book(s) the you want to add to a collection.
- Tap Add to...
- Tap the collection to add the books to.
You can use this same process to add a book that is already in one collection to another collection.
How to reorder or delete collections
Maybe you have a long list of collections and you'd like to put a particular one near the top of the list. Or maybe you want to delete a collection. You can do both in Books.
- Tap Library.
- Tap Collections.
- Tap Edit.
- To move a collection, touch and hold the gripper and drag the collection up or down to its new location.
- To delete a collection, tap the delete button.
- Tap Delete.
- In the sheet that appears, tap Delete.
- Tap Done.
Another way to delete collections? Swipe left on the list of collections before you tap the Edit button.
How to sort books
Books offers a quick way to sort books in your library and within collections. We'll use the library in this example.
- Tap Library.
- Tap Sort.
- Tap a sort preference.

How to sort books manually
Just like being able to organize books on a bookshelf in your office, you can reorder the way your electronic books appear in the Books app—both in your entire library and within collections. Here's how to reorganize your virtual shelves.
- Tap Library.
- Touch and hold any book until it lifts off the screen. A darker shadow will appear behind the book.
- Drag the book to its new location.
How to delete, hide, and unhide books
Most people don't keep every book they've ever read within arm's reach. You probably feel the same way about books you've read on your iPad or iPhone.
We'll explain the steps for clearing out the clutter of finished books using the Library tab, but you can follow the same process within a collection.
Deleting books
- Tap the Library tab.
- Tap Edit.
- Tap the book(s) you want to delete.
- Tap the Delete button.
- Tap Remove Download to delete it from the device.
There's another way to remove books:
- Tap the More button (a series of three dots) under any book
- Tap Remove...
- Tap Remove Download.
Hiding and unhiding books
If you don't want to see the cover image for a book that has been removed from your device, you can hide it. One of the nice new iOS 12 features in Books is that it's now easy to hide selected books.
- Tap Edit.
- Tap the book(s) you want to hide.
- Tap the Delete button.
- Tap Hide Book.
If you want to unhide a book, do this:
- Tap the Reading Now tab.
- Tap the account icon. It's either your picture or your initials and it's located in the upper right-hand corner of the screen.
- Tap Manage Hidden Purchases and enter your Apple ID password if prompted.
- Scroll to find the book you want and tap Unhide to make it visible in your library.
How to re-download deleted books
You've done a great job keeping your virtual bookshelves neat and tidy. You've meticulously organized your collections and gotten rid of books that you've finished. And now you want to go back and re-read a book that you've deleted from your device.
Fortunately, Apple Books makes it easy to do that, whether or not an image of the book's cover remains visible in the app or not. Let me explain.
Redownload a book that is visible in your library
The Books app can continue to show the cover image of a book that you've deleted from your device.
Even though the book has been removed, the small cloud icon underneath the image of the book's cover means that it's among the list of books that you've downloaded from the Book Store..and it can be redownloaded from the Book Store with one tap.
- Tap the Library tab. Alternatively, if the book appears in a collection, you could look for it there.
- Tap the book you want to re-download.
Redownload a book that is not visible in your library
You don't have to allow cover images of deleted books to remain visible in your library. You can easily hide books after you've deleted them from your device. But to redownload a hidden book, you'll need to unhide it first.
- Tap the Reading Now tab.
- Tap the account icon. It's either your picture or your initials and it's located in the upper right-hand corner of the screen.
- Tap Manage Hidden Purchases and enter your Apple ID password if prompted.
- Scroll to find the book you want and tap Unhide to make it visible in your library.
- Tap Account.
- Tap Done.
- Tap the Library tab.
- Tap the newly unhidden book to download it.
How to sync your Books library on iPhone and iPad
If you read books or listen to audiobooks on multiple devices, then you'll appreciate the syncing features of Apple Books when used in conjunction with your iCloud account. Along with your Reading Now collection, bookmarks you place and notes and highlights you create in books will also sync between devices. In addition, you can sync any PDFs stored in Books via iCloud Drive.
To make all this magic happen, you must first allow Books to use iCloud and iCloud Drive.
- Tap Settings.
- Tap your name.
- Tap iCloud.
- Tap the switch to turn on Books.
- Tap the switch to turn on iCloud Drive.
Now, turn on some switches for the Books app.

- Scroll to the top of the list and tap Apple ID.
- Tap Settings.
- Scroll down the list and tap Books.
- Tap the switch to turn on Reading Now.
- Tap the switch to turn on iCloud Drive.
Tapping Update Other Devices will show you any other devices that require an OS update to sync changes to your library.
How to sync your Books library on your Mac
In addition to keeping your Books library, bookmarks, notes, highlights, and PDF files in sync on all your iOS devices, you can get the Mac in on the action, too.
As with syncing your Books library between your iOS devices, setting up syncing on your Mac is a two-step process.
Enable Books on your Mac to use iCloud and iCloud Drive
- From the Apple menu, choose System Preferences.
- Click iCloud.
- Check the box to enable iCloud Drive.
- Click the Options.. button for iCloud Drive.
- In the Documents tab, check the box to enable Books.
- Click Done.
Enable sync settings for the Books app
Open the Books app and do the following:
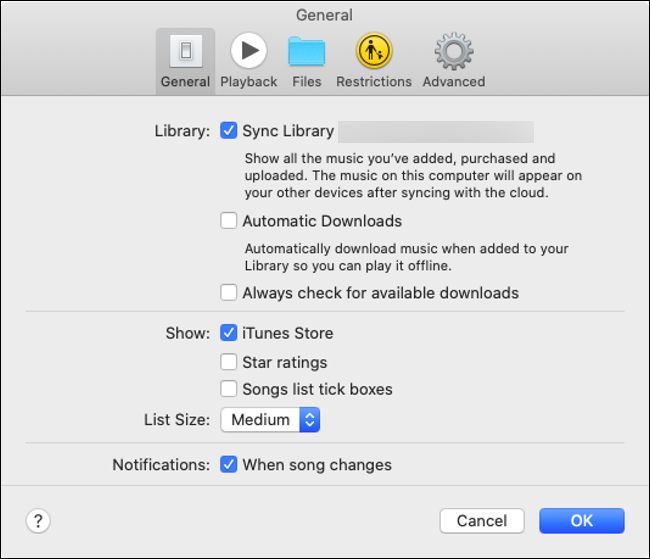
- From the Books menu, choose Preferences.
- Click General.
- Check the box to Sync bookmarks, highlights, and collections across devices.
How To Sync Itunes Library From Mac To Ipad Download
Power upAnker's PowerCore Wireless 10K charger is a battery pack without the fuss
Anker is out with a new wireless battery pack that'll keep things ticking along no matter where you are.
While you've been able to use an iPhone and iPad PC-free since the days of iOS 5, plugging in is still an option for those that don't trust iCloud and other such services for syncing their information between an iOS device and a Mac or PC. And aside from syncing your device and backing it up, there's a myriad of things that you can sync through iTunes.
Follow this guide to learn how to syncing apps, media, and more to your iPhone or iPad with iTunes.
How to sync your iPhone or iPad to iTunes with a cable
This one's pretty basic. Just plug in and keep iTunes and your phone in sync.
- Connect your iPhone or iPad to your Mac with a Lightning or 30-pin connector cable.
- Open iTunes from your Dock, Applications folder, or Finder.
Click the phone or tablet button next to the media selector near the upper-right corner of iTunes.
Click Sync.
How to set up Wi-Fi sync to iTunes for your iPhone or iPad
Of course, nowadays you don't even need to physically plug in your iPhone or iPad to sync with iTunes.
- Connect your iPhone or iPad to your Mac with a Lightning or 30-pin connector cable.
- Open iTunes from your Dock, Applications folder, or Finder.
Click the phone or tablet button next to the media selector near the upper-right corner of iTunes.
Check the box next to Sync with this iPhone over Wi-Fi
Click Apply.
You can then sync your iPhone over Wi-Fi like so:
- Open iTunes from your Dock, Applications folder, or Finder.
Click the phone or tablet button next to the media selector near the upper-right corner of iTunes.
Click Sync.
How to sync apps to your iPhone or iPad with iTunes
Keep your device's apps in sync, removing and installing them without having to paw at your iPhone or iPad.
- Connect your iPhone or iPad to your Mac with a Lightning or 30-pin connector cable.
- Open iTunes from your Dock, Applications folder, or Finder.
Click the phone or tablet button next to the media selector near the upper-right corner of iTunes.
Click Apps.
Click the Install button next to an app that you want to install on your iPhone or iPad.
Click the Remove button next to an app that you want to uninstall from your iPhone or iPad.
Click Sync to sync changes.
How to transfer files between iOS apps and your Mac
You can also move files between individual iOS apps and your Mac or PC.
- Connect your iPhone or iPad to your Mac with a Lightning or 30-pin connector cable.
- Open iTunes from your Dock, Applications folder, or Finder.
Click the phone or tablet button next to the media selector near the upper-right corner of iTunes.
Click Apps in the sidebar.
Scroll down to File Transfer and find the app you wish to transfer files from or to.
Click the app.
Click Add…
Click on the file or folder you wish to transfer to the app.
Click Add.
Click on the file from the app you wish to save to your Mac.
Click Save to…
Click on the location that you want to save the file to.
Click Save To.
Click Sync.
How to sync media to your iPhone or iPad with iTunes
You can sync all sorts of media from iTunes to your iPhone or iPad, such as music, movies, TV shows, books, and podcasts.
- Connect your iPhone or iPad to your Mac with a Lightning or 30-pin connector cable.
- Open iTunes from your Dock, Applications folder, or Finder.
Click the phone or tablet button next to the media selector near the upper-right corner of iTunes.
Click the name of the media type in the sidebar.
Click the checkbox next to Sync [Media type].
Click the checkbox next to Automatically include to automatically sync a certain number of movies, TV episodes, podcast episodes, or iTunes U courses.
Under Books and Tones, click All or Selected to choose what to sync.
Click any available drop-down menus to select the criteria for automatically syncing a particular media type to your iPhone or iPad.
Click the checkboxes next to the artists, albums, movies, shows, courses, or podcasts that you want to sync.
Click the checkboxes next to specific episodes or classes if you're syncing TV or podcast episodes, or iTunes U course items.
Click Apply.
How To Sync Itunes Library On Mac To Iphone
How to sync photos to your iPhone or iPad with iTunes
Don't like iCloud Photo Library? No problem. Sync photos from your Mac or PC to your iOS device in iTunes.
- Connect your iPhone or iPad to your Mac with a Lightning or 30-pin connector cable.
- Open iTunes from your Dock, Applications folder, or Finder.
Click the phone or tablet button next to the media selector near the upper-right corner of iTunes.
Click Photos in the sidebar.
Click the checkbox next to Sync Photos.
Click the drop-down menu.
Choose between copying from Photos or any other photo folder.
Choose to sync All photos and albums or Selected albums.
Check the boxes to only sync your favorites, include videos, or automatically include photos from a certain period.
Click the albums and people you want to sync if you chose to sync selected albums.
Click Apply.
How to sync contacts and calendars to your iPhone or iPad with iTunes
If you don't like to entrust your contacts and calendars to a cloud service provider like Apple or Google, you can sync them manually with iTunes.
 Dec 11, 2018 You can always switch back to the regular library when you need to. Double click the backup library to open it, then open the preferences for Photos from Photos Preferences in the menubar. Select “Use as System Photos Library,” which will change the default to the new library. Back Up Your Drive Automatically With Time Machine. Backing up files manually is not the best solution, as.
- Connect your iPhone or iPad to your Mac with a Lightning or 30-pin connector cable.
- Open iTunes from your Dock, Applications folder, or Finder.
Click the phone or tablet button next to the media selector near the upper-right corner of iTunes.
Click Info in the sidebar.
Click the checkboxes next to Sync Contacts and Sync Calendars.
Under Contacts, choose between syncing All contacts or Selected groups.
Choose any available groups if you're only syncing some contacts.
Check the box next to Add contacts created… (etc.) to choose where to add contacts created outside of groups on your device should go.
Under Calendars, choose between syncing All calendars or Selected calendars.
Choose any available calendars if you're only syncing some of them.
Check the box to stop syncing events a set amount of days after they've taken place.
Click Apply.
Questions?
Be sure to tell us in the comments if you have any other questions about syncing your iPhone or iPad to iTunes.
macOS Catalina
Main
Money well spentYou can save the cost of a MacBook Air by buying a refurbished Mac Pro
Apple's current Mac Pro is now available as a refurbished item from apple.com.